Renko Charts
Renko Midline Reject Trade Setup Brick Patterns
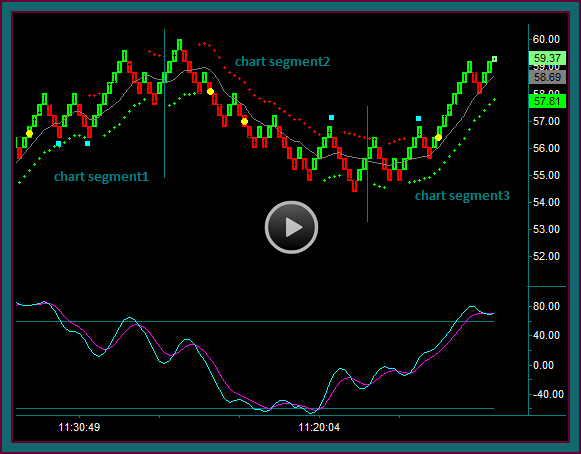
This was a good chart for discussing the renko midline reject trade setup, because (1) there were 2 midline reject brick patterns that were not full setups to take the trade (2) there were 2 midline reject brick patterns that were slightly different – but the trades were done because of having very good price continuation components.